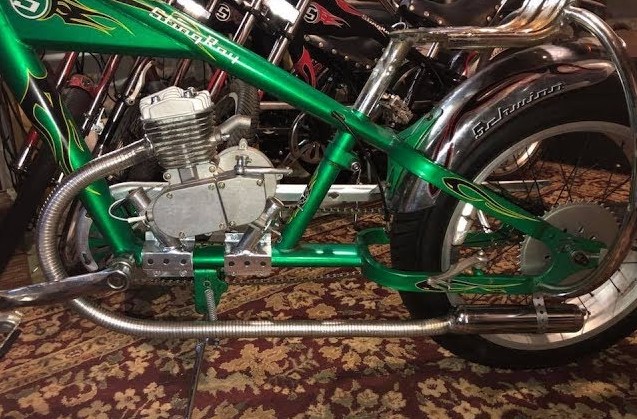
Mounting a rear tire on a Schwinn OCC Chopper demands precision, patience, and the right technique. This custom-styled cruiser isn’t just about bold looks it’s built with a unique frame and wheel configuration that can trip up even seasoned bike enthusiasts.
Skipping steps or misaligning parts can throw off your ride, wear down the tire, or damage the drivetrain. A properly mounted rear tire not only boosts performance but also ensures safety and smooth cruising.
If you’re restoring an old-school chopper or replacing a worn-out tire, understanding the mounting process makes all the difference. This guide breaks it down clearly, so the job feels less like a mechanical mystery and more like a simple, satisfying task.
Grab your tools, get that chopper up on a stand, and let’s lock in that rear tire the right way. Smooth rides and solid grip are just a few steps away.
How to Mount Rear Tire on a Schwinn OCC Chopper?
Changing the rear tire on a Schwinn OCC Chopper bike may look tricky at first. That wide rear tire and chopper-style frame can make things feel more complex than a regular bicycle.
But with the right tools and a step-by-step method, the process becomes simple. Whether you’re replacing a worn-out tire or upgrading for better performance, you won’t need advanced mechanical skills to do the job. Just a bit of patience and a steady hand.
This guide will walk you through each step of the process. From preparing the tools to tightening the last bolt. The steps are clear, simple, and written in easy language for better understanding.
Tools You’ll Need
Before starting, gather these tools:
-
Socket wrench or adjustable wrench
-
Tire levers
-
Bike stand or blocks (to support the frame)
-
Allen wrench set
-
New tire and tube (if replacing)
-
Lubricant (optional)
Keep your workspace clean and well-lit. This helps avoid confusion and lost bolts.
Step-by-Step Guide to Mount the Rear Tire
Step 1: Turn the Bike Upside Down or Use a Stand
Flip the Schwinn OCC Chopper upside down and rest it on its handlebars and seat. If you have a bike stand or wooden blocks, you can use those to lift the bike. Make sure the bike is steady before continuing.
Step 2: Loosen the Rear Axle Nuts
Use a wrench to loosen the axle nuts on both sides of the rear wheel. Don’t remove them completely yet. Just loosen enough so the wheel slides out later.
Step 3: Disconnect the Brake Arm
The Schwinn OCC has a coaster brake. It uses a brake arm connected to the frame. Locate the arm and remove the bolt holding it. Set it aside safely.
Step 4: Slide Out the Chain
Push the rear wheel forward slightly to release tension on the chain. Then, lift the chain off the rear cog. Let it hang loosely on the frame or rest it on the crank.
Step 5: Remove the Rear Wheel
Now that the chain and brake arm are free, pull the rear wheel out from the frame. Hold it firmly as it may feel a bit heavy due to the thick tire.
How to Mount the New or Repaired Tire?

Step 6: Check the Tire Direction
Most tires have a small arrow printed on the side. This shows the direction the tire should spin. Make sure it matches the direction the wheel moves when riding.
Step 7: Install the Tube (If Needed)
Insert the tube into the tire if you’re replacing it. Add a little air to shape it. Then tuck it neatly inside the tire. Avoid folding or pinching the tube.
Step 8: Mount the Tire onto the Rim
Use your hands or tire levers to fit the tire onto the wheel rim. Start from one side and move around slowly. Finish by tucking in the last section with care.
Step 9: Inflate the Tire
Use a pump to inflate the tire to the recommended pressure. You’ll find this written on the side of the tire. Don’t overfill. Check the shape and spin the tire once to make sure it’s seated well.
Reinstalling the Rear Wheel
Step 10: Slide the Wheel into the Frame
Place the wheel back between the frame arms. Make sure the chain fits over the rear cog. Pull the wheel back slightly to tighten the chain.
Step 11: Reattach the Brake Arm
Align the brake arm with the mount on the frame. Reinsert the bolt and tighten it securely. This keeps your rear brake working.
Step 12: Tighten the Axle Nuts
Once the wheel is in place and the chain has proper tension, tighten the axle nuts on both sides. Double-check that the wheel is centered and doesn’t rub the frame.
Final Checks
Spin the rear tire. It should turn smoothly without wobbling. Press the pedal backward to check the coaster brake. It should stop the wheel with a light push. Check the chain for tightness it should have a small amount of slack, not too tight or too loose.
Extra Tips
-
A drop of bike oil on the axle helps parts slide easier.
-
Keep your hands clean while handling the chain to avoid grease stains.
-
If the tire feels off-center, loosen the nuts and adjust it slightly before re-tightening.
FAQs
How tight should the chain be?
Leave about half an inch of play when you move the chain up and down. A too-tight chain can cause damage.
What size is the rear tire on a Schwinn OCC Chopper?
Most Schwinn Stingray OCC Choppers use a 20×4.25-inch rear tire. Always check the sidewall for exact size.
Can I use any type of tire?
No. The wide rim and frame need a fat tire designed for chopper-style bikes. Regular bike tires won’t fit.
Do I need to remove the chain every time?
No. Just slide the wheel forward to loosen it and lift the chain off the rear cog.
Conclusion
Mounting the rear tire on a Schwinn OCC Chopper doesn’t need to be difficult. With a few tools and these clear steps, anyone can handle the job at home.
The key is staying patient, keeping things steady, and following each step in order. Taking care of your bike’s rear tire not only improves the ride but also keeps you safe on the road. Start slow, check your work, and enjoy the process