A Ryobi 40V battery often powers some of the most reliable lawn tools, but sometimes it refuses to charge or show any signs of life. Many users assume it’s completely dead, yet a simple reset can often bring it back.
The built-in protection circuit inside these lithium-ion packs can shut down the battery after over-discharging or a sudden power interruption. A quick reset reactivates the internal circuitry and restores normal function.
Learning the right method prevents unnecessary replacements and keeps your tools running longer. The process doesn’t require advanced skills just a bit of patience and the right steps.
Understanding how to reset your newer Ryobi 40V battery ensures consistent power, better performance, and a longer lifespan for your investment. Explore this guide to uncover a quick and reliable way to revive a seemingly dead Ryobi battery and get back to your yard work without delay.
How to Reset a Newer Ryobi 40V Battery?
A Ryobi 40V battery powers some of the most trusted tools for lawn care and yard work. Over time, some users notice that their battery stops charging, the indicator lights don’t turn on, or the charger refuses to recognize it.
These issues often happen because the battery’s built-in protection circuit shuts down after deep discharge, overheating, or long storage without use. The good news is that most of these problems can be fixed through a simple reset process.
This guide explains how to reset a newer Ryobi 40V battery step by step, what causes these issues, and how to prevent them in the future. The instructions are clear, safe, and easy to follow even for beginners.
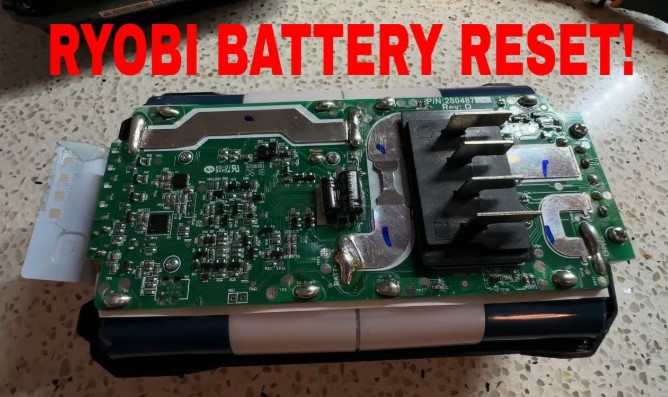
Understanding the Ryobi 40V Battery System
Ryobi 40V batteries use lithium-ion cells that deliver consistent power and longer runtime compared to older NiCad batteries.
They also contain a Battery Management System (BMS) a small circuit that protects the cells from overcharging, over-discharging, and overheating.
Sometimes, this BMS gets “stuck” in protection mode, especially if:
-
The battery was fully drained and left unused for weeks.
-
It overheated during use or charging.
-
It was stored in extreme temperatures.
-
The charger was unplugged during charging.
Once the protection mode activates, the battery stops sending or receiving current. A reset reactivates the BMS and restores normal function.
Step-by-Step Guide to Resetting a Ryobi 40V Battery

Step 1: Inspect the Battery and Charger
Start by checking both the battery and charger for simple issues.
-
Look for corrosion or dirt on the metal contacts. Use a dry cloth or small brush to clean them.
-
Try charging another Ryobi 40V battery with the same charger.
-
Try inserting the “dead” battery into another charger if available.
If the charger works fine with other batteries, your battery likely went into deep discharge mode.
Step 2: Cool Down and Prepare the Battery
Remove the battery from the tool and charger. Place it on a flat, cool surface for about 10–15 minutes. Batteries that overheated during use or charging can’t reset properly until they cool down. Make sure the vents on the battery are not blocked.
Step 3: Try the “Charger Wake-Up” Method
This technique often works for newer Ryobi 40V batteries with built-in protection. It helps the charger slowly detect the low-voltage cells again.
Process:
-
Insert the battery into the Ryobi charger for 2–3 seconds.
-
Remove the battery and wait 5–10 seconds.
-
Repeat the insert/remove process 4–5 times.
Each short connection sends a small voltage signal that “wakes up” the battery management circuit. After a few cycles, leave the battery in the charger for at least 30 minutes.
The red light should come on to show that charging has started. If the charger still doesn’t recognize the battery after several attempts, move to the next step.
Step 4: Perform a Gentle Jump Start (Optional)
Deeply discharged batteries sometimes need a small external boost before the charger can detect them. This method transfers a little power from a good battery to the dead one.
What you’ll need:
-
A working Ryobi 40V battery (fully charged).
-
Two short wires (16 or 18 gauge).
Steps:
-
Identify the positive (+) and negative (–) terminals on both batteries.
-
Use one wire to connect the positive terminal of the good battery to the positive terminal of the weak one.
-
Use the second wire to connect the negative terminal of the good battery to the negative terminal of the weak one.
-
Hold the connection for about 10 seconds only.
-
Disconnect both wires and place the weak battery into the Ryobi charger.
The small power transfer “wakes up” the protection circuit and gives the charger a signal to begin charging. Never hold the connection for more than 10–15 seconds to avoid overheating.
Step 5: Complete a Full Recharge
Once the charger shows a steady red light, leave the battery in place for 2–3 hours or until the green light appears. Do not unplug too early. The full charge allows all cells to balance and helps prevent the same problem from returning.
If the charger still doesn’t detect the battery after jump-starting, the cells may be permanently damaged and require replacement.
Signs the Reset Worked
You’ll know the reset was successful if:
-
The red light on the charger turns solid (charging mode).
-
The battery becomes slightly warm after 20–30 minutes.
-
The green light appears after a few hours.
-
The battery powers the tool normally again.
If the charger light keeps flashing red or shows no light at all, the battery may have internal cell damage.
Tips to Prevent Battery Reset Issues
Proper care keeps Ryobi 40V batteries working longer and reduces the need for resets.
-
Avoid full discharge. Stop using the tool once the power drops instead of running it until it dies.
-
Store partially charged. Keep batteries at around 50–60% charge during long storage periods.
-
Keep away from heat. Avoid leaving the battery in the sun, car trunk, or hot shed.
-
Charge regularly. Recharge every two to three months during winter or storage.
-
Clean contacts often. Use a dry cloth to keep the terminals dust-free.
These small habits extend lifespan and maintain charging health.
Common Reasons Why Ryobi 40V Batteries Stop Working
-
Over-Discharge: The most common reason. The voltage drops too low for the charger to detect.
-
Overheating: The built-in circuit shuts off to prevent damage.
-
Cold Temperatures: Charging in freezing conditions stops the battery from accepting current.
-
Dirty or Corroded Terminals: Poor contact prevents charging.
-
Defective Charger: Some chargers fail to send enough current to restart a dead battery.
Understanding these causes makes troubleshooting easier next time.
FAQs
Q1: Can I reset my Ryobi 40V battery without tools?
Yes. The charger wake-up method works without any tools and is safe for most users.
Q2: What does a flashing red light on the charger mean?
It means the battery is too hot, too cold, or has entered protection mode. Wait until it returns to normal temperature and try again.
Q3: How long does it take to recharge a Ryobi 40V battery after reset?
Usually 2–3 hours for a full charge, depending on the model and charger.
Q4: My battery charges but drains fast. What does that mean?
The cells may be wearing out. Over time, capacity drops even after successful resets.
Q5: Is it safe to leave the battery on the charger overnight?
Yes, Ryobi chargers have auto-shutoff features, but it’s better to remove it once fully charged.
Conclusion
Resetting a newer Ryobi 40V battery can restore power and extend its life. By checking the charger, cleaning contacts, cooling the battery, using the wake-up process, or applying a short jump start, most users can bring a “dead” battery back to working order.
Regular charging habits and safe storage conditions prevent future problems. With these easy steps, your Ryobi battery will stay ready for every job, season after season.